Dogwalk Asset Creation Process
- Article
- 20 Jun 2025
- 9 min read

This article goes into the artistic and technical process of creating assets for Dogwalk. Take a look at the Dogwalk content gallery for more behind the scenes images and videos.
Kitsu
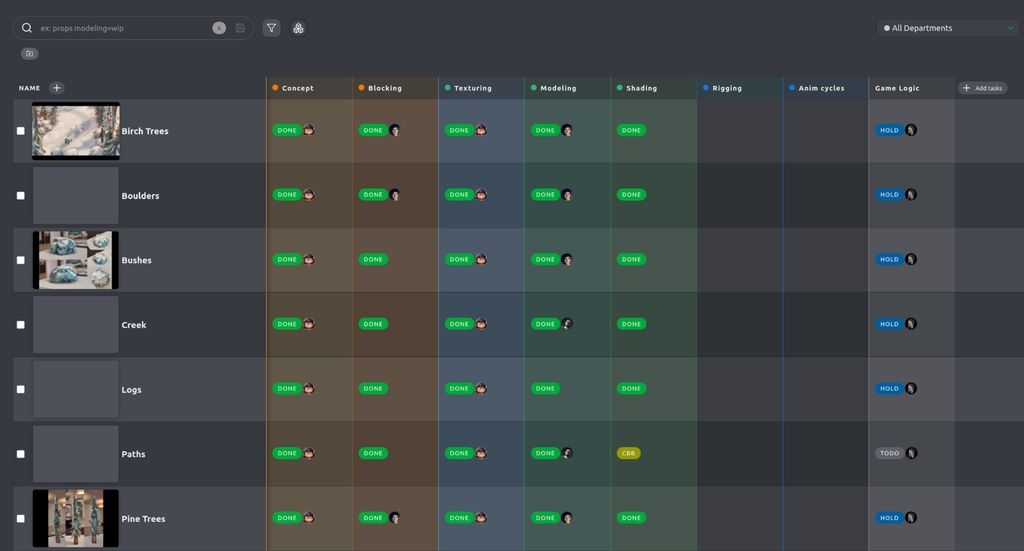
Before starting to work on the assets we looked at some existing concept pieces to determine what kind we needed. Some of the initial assets are the pine trees, birch trees, bushes, boulders and some props. The difference between a prop and a library asset is the interaction between a character and an asset. A shovel, tennis ball and traffic cone are all props that have rigs and can be animated, while boulders and trees are re-usable library assets that are placed throughout the environment. On our production management tool, Kitsu, we add the assets to keep track of its status and communicate any feedback/paintovers.
As an example I'll use the pine tree which is a prominent and one of the first assets created for Dogwalk. The steps described here are mostly chronological but there are exceptions on a per asset basis.
Discussing reference & ideas
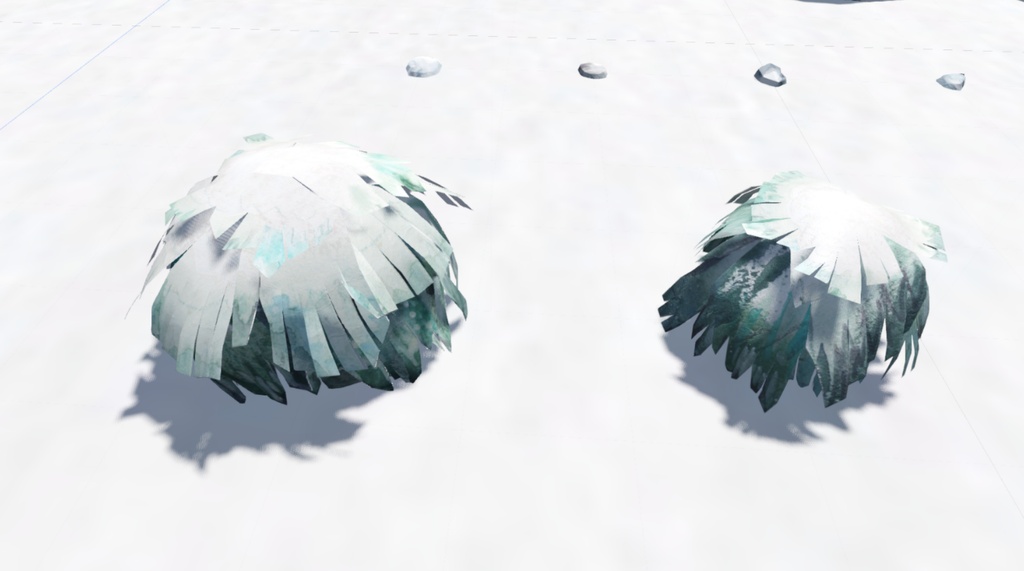
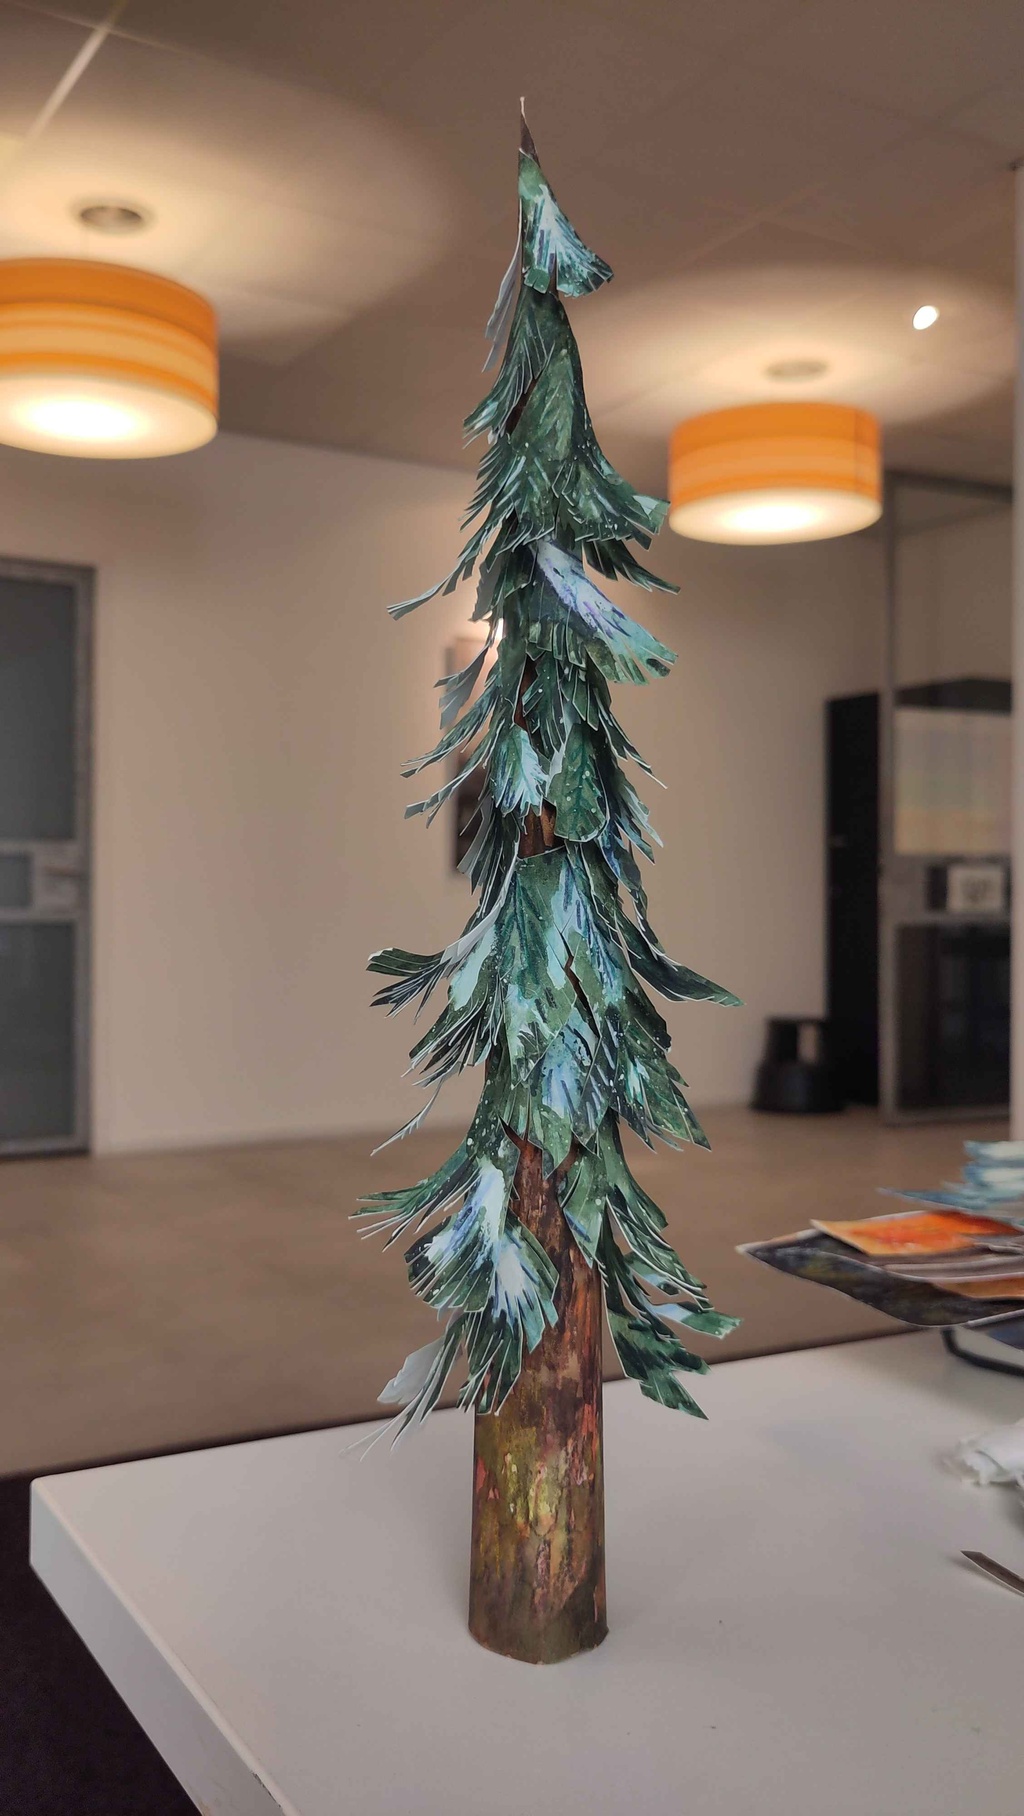
Aside from digital concepts, Vivien Lulkowski - Art Director - created real-life paper craft models that were essential in achieving the art-directed design/result, we used these references and talked about how the models were built. Especially the bushes needed several iterations to get the right volume and leaf assembly. Vivien also painted various textures that were scanned and processed digitally for easier/optimized/tiled mapping. Next is creating a preliminary model and start iterating.
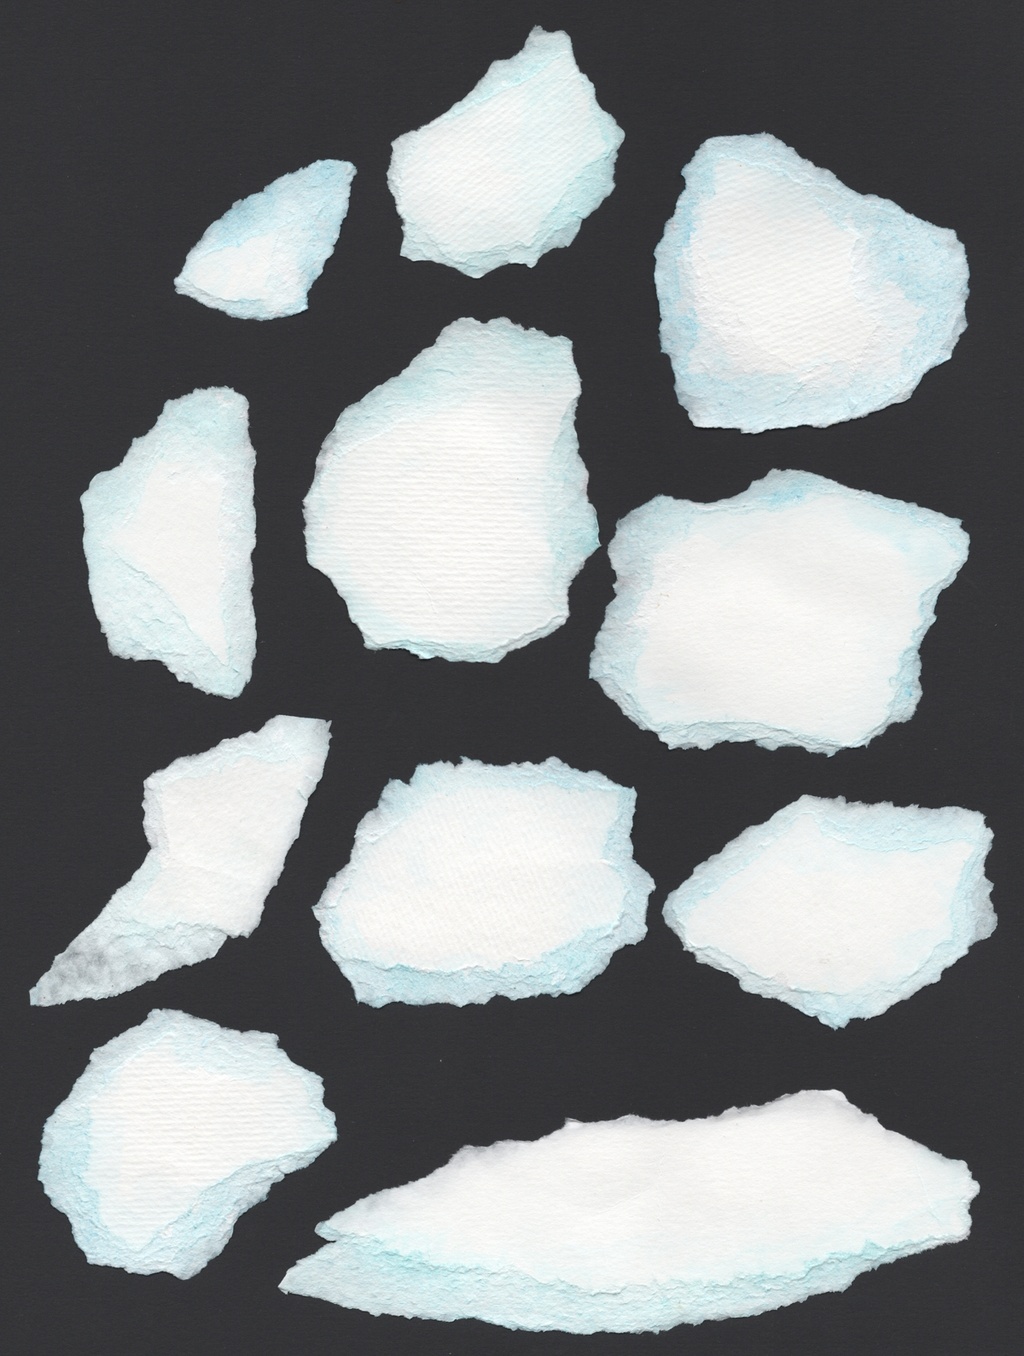
Initial model
The first model had a simple dart shape as a base with plane cuts distributed along it. The pine cuts were created by placing the separate paper craft elements on the scanner plate and cutting the pieces out in Krita. This is a bit of a tedious process so we tried using different paper backgrounds in some cases to convert certain values to alpha. This wasn't perfect but worked quite well for very gently ripped pieces of paper.
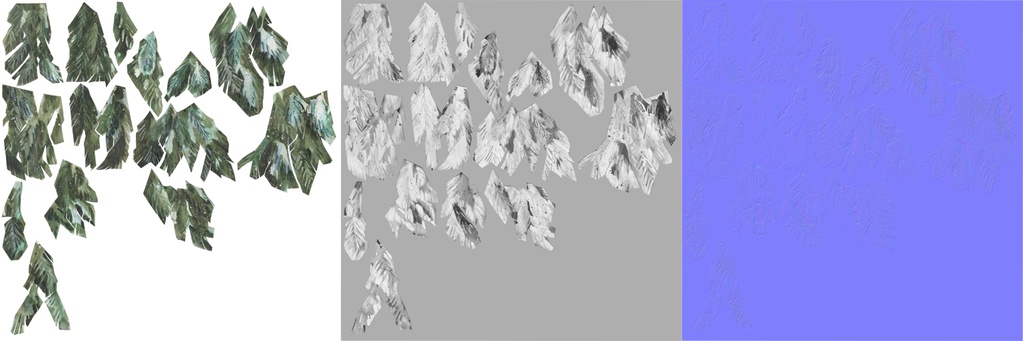
Texture maps
Next is creating simple roughness and normal -maps based on the albedo, it won't be the most accurate but in our game we are hovering above the environment so there is more flexibility. After exporting, I used Image > Mesh Plane to import the texture maps with alpha already assigned, and cutting out the pieces by hand. By taking sections of the cuts and re-assembling them again in a different order we achieve more variations.
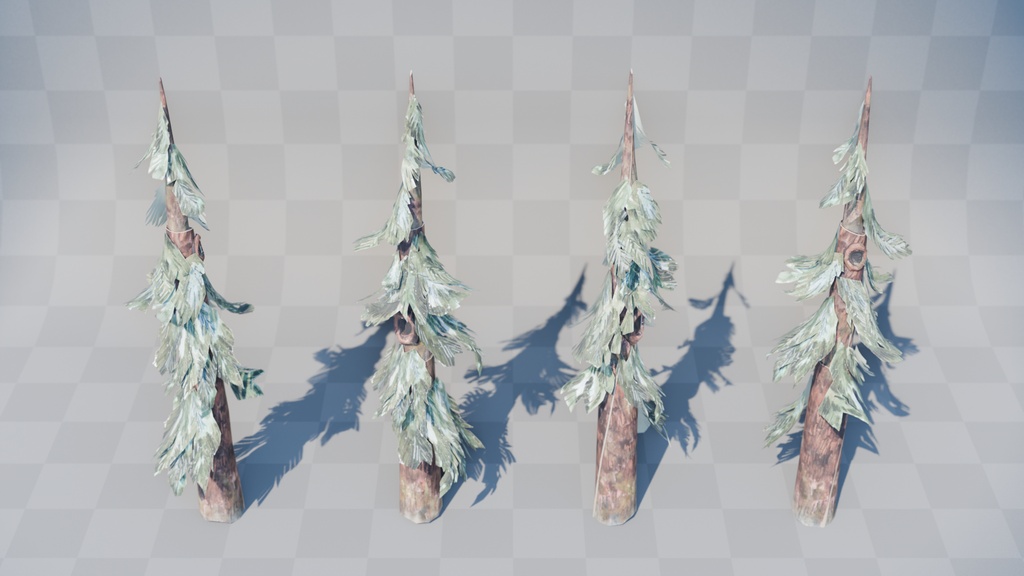
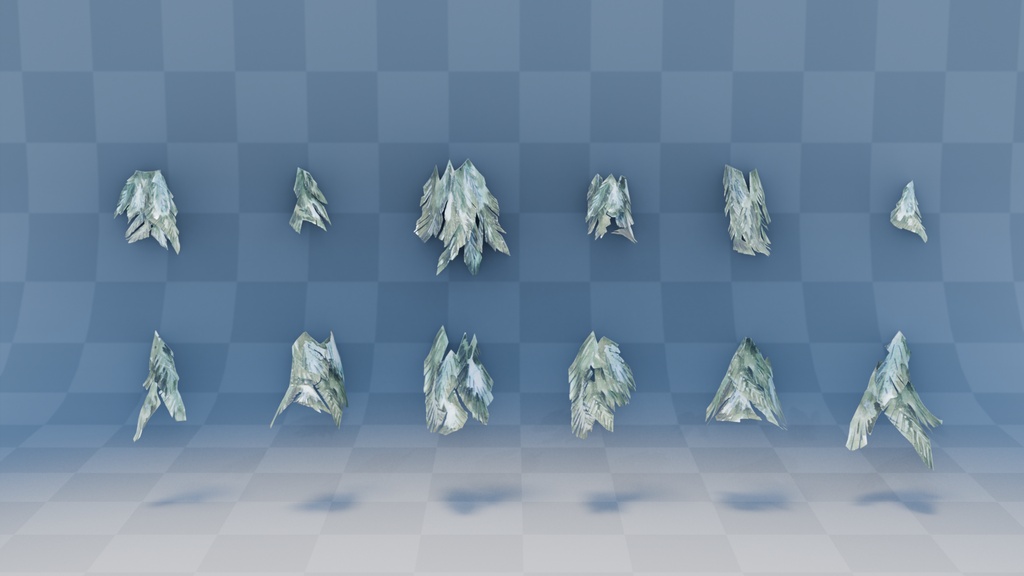
Scattering pine cuts
I wanted to create an easy and procedural way to create variation on the pine cuts. By adding a simple Geometry Nodes setup and vertex weights I can determine the way the individual strands of the cuts are "sticking out". To bend the assembled pieces around the base of the tree, a lattice is used for all of the pine cuts assets.
Initially I tried a tileable pine cut texture and cut my own pine cut shapes, but this resulted in a bland generic look. The scanned pieces were not only hand painted but also have these nice imperfections where paper is ripped creating white edges. This sells the handmade paper craft look much better!
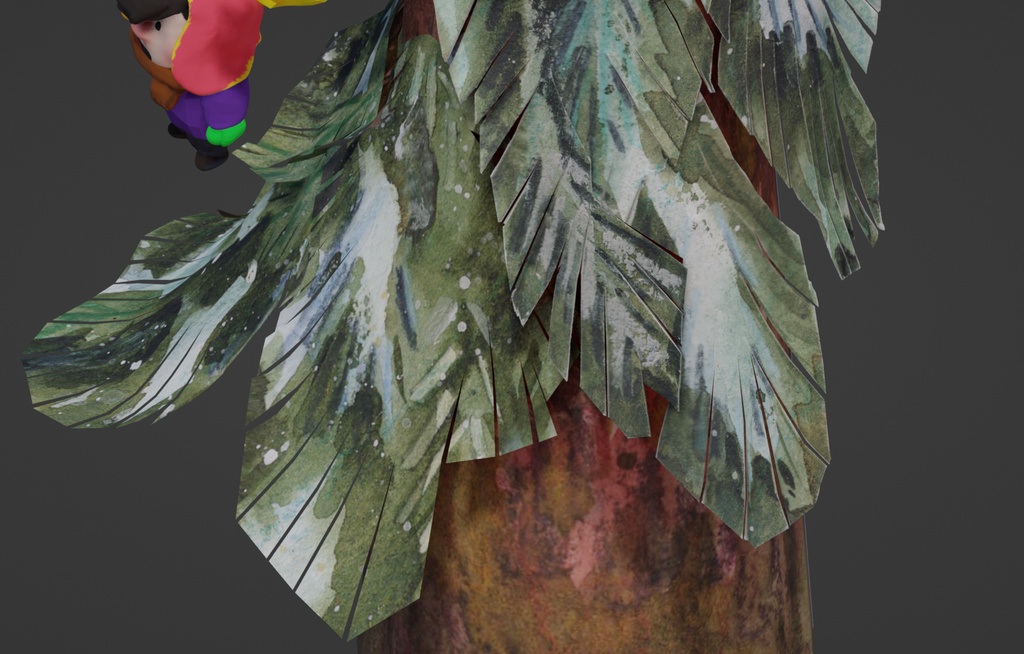
After creating a few pine cuts it is time to add them to the base of the tree. My first instinct was placing them as instances manually but I figured speed was more important so I resorted to Geometry Nodes to scatter the pine cuts. Eventually the procedural scattering was removed and manual placement is desired for specific art direction and optimization. For most objects during this project I liked adding the "Triangulate" modifier to see how the models would behave. This meant that the result in final geometry was exactly the same with the modifier applied during export. We also decided to add a "Weighted Normal" modifier to avoid baking normal maps but spending more rendering budget on support loops, even though a lot of detail in the final image is thanks to handpainted albedo maps.
Changes to the pine tree were applying the Geometry Nodes on the base trunk after which UV’s were reworked and topology optimized. The pine tree was now made up of different sections fitting into each other like a collapsible telescope. It also received more subtle surface imperfections. Another element we added later on were 'pine knotholes' to add more variation on the tree trunk.
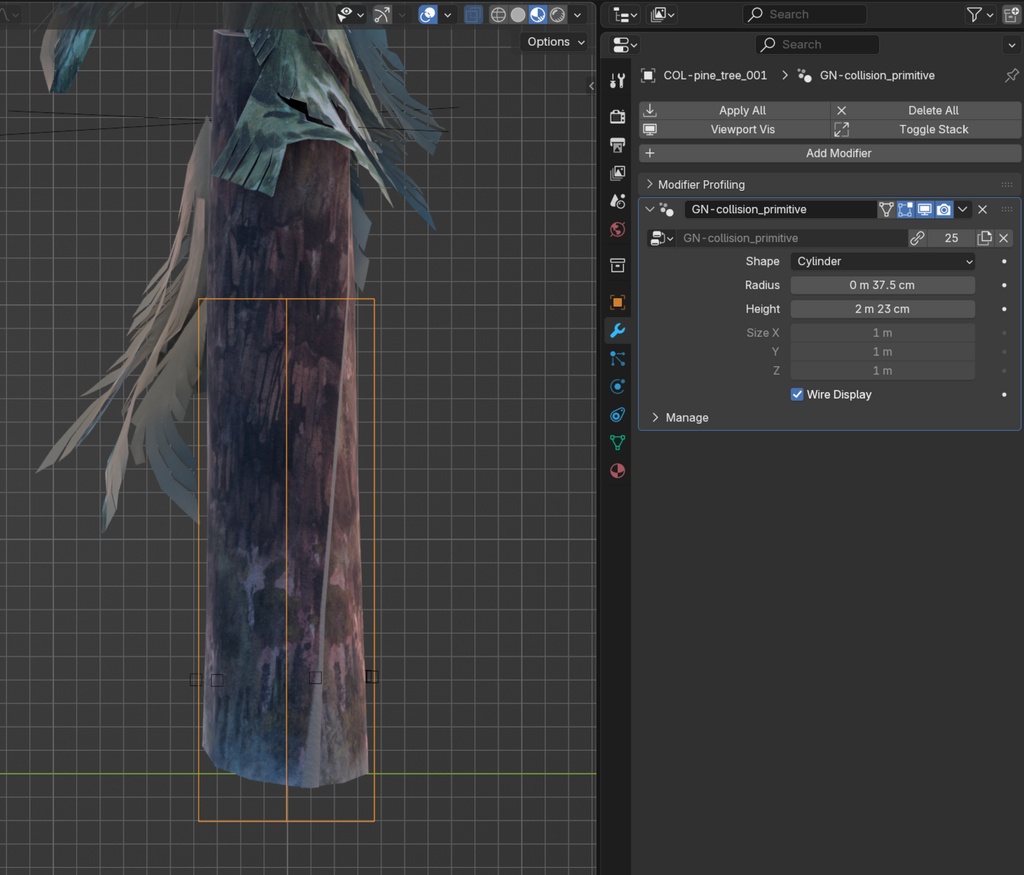
Before exporting the asset it is important to add a collision shape so the characters don’t intersect. This was solved by usually adding simple shapes like spheres, pill shapes, cylinders and more. In this case a cylinder was added at the base with a named prefix “COL-” so that the addon understands it is a collision object in Godot.
In the game we have a leash that can collide with objects, but in order to collide with more control, Julien Kaspar - Game Director - came up with leash points that snaps the leash to those points when overlap is detected.
During production, we decided to create an “Asset Zoo” to inspect and compare all the assets together to see how they work. This was a separate .blend file which was also loaded in Godot for testing. To assist production we used Blender’s Asset Library that has become essential in our projects, especially since we did all of the set dressing in Blender.
Export to Godot
The "Asset Export" addon developed by Simon, is used to initialize (tag) collections for exporting. The export is pointing toward the Godot game directory and read when Godot is open. In this case, the asset is exported as a static asset, meaning with collision.
Edge wear Before actually exporting the asset we can add additional visual details through Color Attributes using "Wear". Simon created a shader setup that is translated to a Godot material, this makes it very easy to adjust parameters in Blender and are automatically updated in Godot. The shader contains a "Paper Wear" section to adjust any parameters to simulate breaks in the paper. We used this to blend assets with the snow better at ground level.
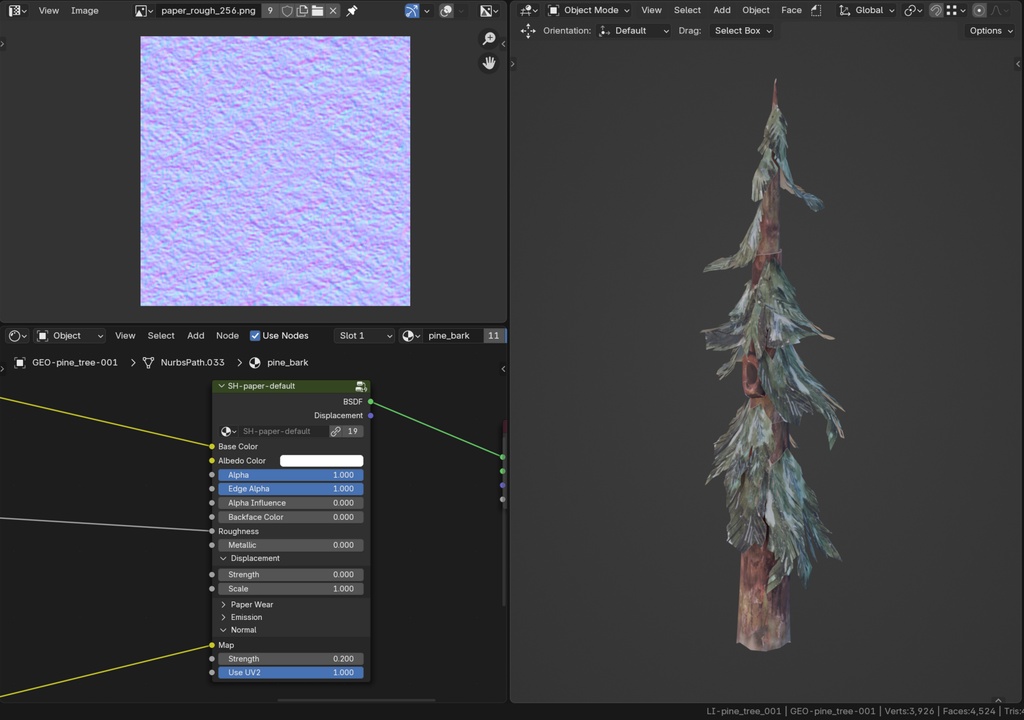
Paper shader
The material has various options to influence various alpha effects, backface color, and the standard channels like Base Color, Roughness, and normal. It also allows the use of a secondary UV2 channel for the normal map to increase detail using tileable textures.
Inspect in Godot When the asset has been loaded in we do a visual inspection how it compares to Blender’s result. Since the pine_tree_001 is used in different sets we can open the game world (or in a test scene) and see if the collision and leash points work as expected.
Asset Iteration
At this point we would potentially iterate on the asset after receiving feedback. One of the things that unfortunately didn't work were Geometry Nodes instances with the pine cuts scattered on the base of the pine tree. This was solved later but in the meantime we used collection instances to circumvent this. Which wasn't a big issue because the pine trees, like most assets, needed a more art directed touch.
To add more life into the pine trees, we need to add vertex wind on the pine cuts, which is vertex paint influencing the vertex shader in Godot. This allows the pine cuts to sway and move in the wind a bit.
When the player stops moving, the camera moves closer to the characters, this is why the trees become transparent. As a small detail we decided to place a smaller inner tree trunk that doesn't fade out. This trunk has an alternative material that stays opaque with a ripped texture on the edge.
Final optimizations
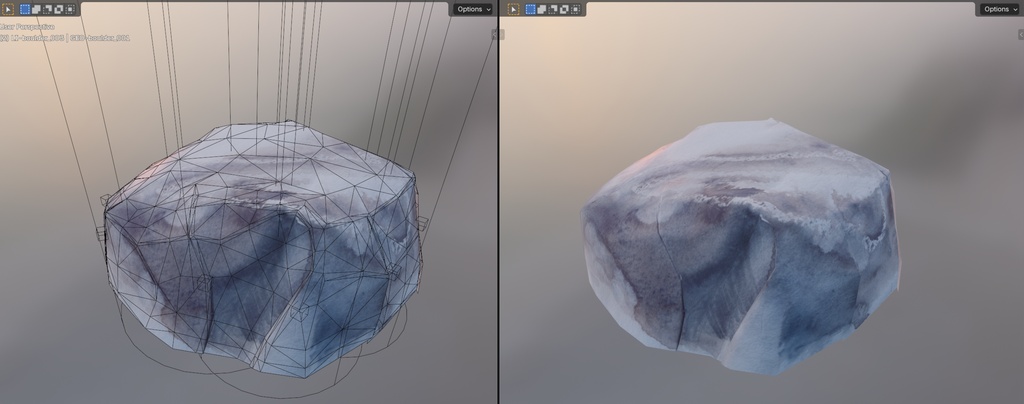
Any small topology and collision optimizations take place here before the final version is approved. For example:
- For the Boulders, we needed to change the entire collision shape. We noticed the player getting stuck against the boulders without justifiable visual clarification
- Pine cuts had too many loops which added detail the player wouldn't really perceive
- The birch leaves have a flat texture transitioning to 3D geometry, this resulted in bad normals and we had to cut the flat sections to remove this visual glitch
Thanks for reading!
Join to leave a comment.