Proposal: Facial Rigging with shape keys
- Update
- 24 Feb 2025
- 6 min read

Over the years of animating on numerous films and projects I've been working with different rigging techniques used to create expressive faces. Each character required their own personality, style and shape language and therefore their own rigging structure. At Blender, most of the recent facial rigs use a combination of facial bones, corrective blendshapes and additional deformers. The use of bone based rigs have it's advantages but can become complicated when combining them with action constraints, shapekeys and other drivers to create a certain deformation.
This is a prototype of a facial rig built on a modified model of 'Spring'. The purpose of this showcase is to demonstrate the shape key based rigging workflow. I've solely focused on the shapekey implementation and ignored the eyes and eyelids for this prototype. The lips, mouthcorners, cheeks, nostrils and brows are build with only shape keys. The jaw, head and neck are using a bone structure.
My experience as working as a lead animator at Sony Imageworks and a teacher ('facial animation' course) at Animschool gave me the opportunity to dive into the process of their facial rigs and came to the conclusion that in order to get specifically designed shapes, you want to avoid computer interpolation as much as possible and rather design them by an artist. If you look at the animation industry over the last 10 years, the overwhelming majority of feature film facial rigs are all using the same method: A lot (and i mean a really lot) of blendshapes or what we call shape keys.
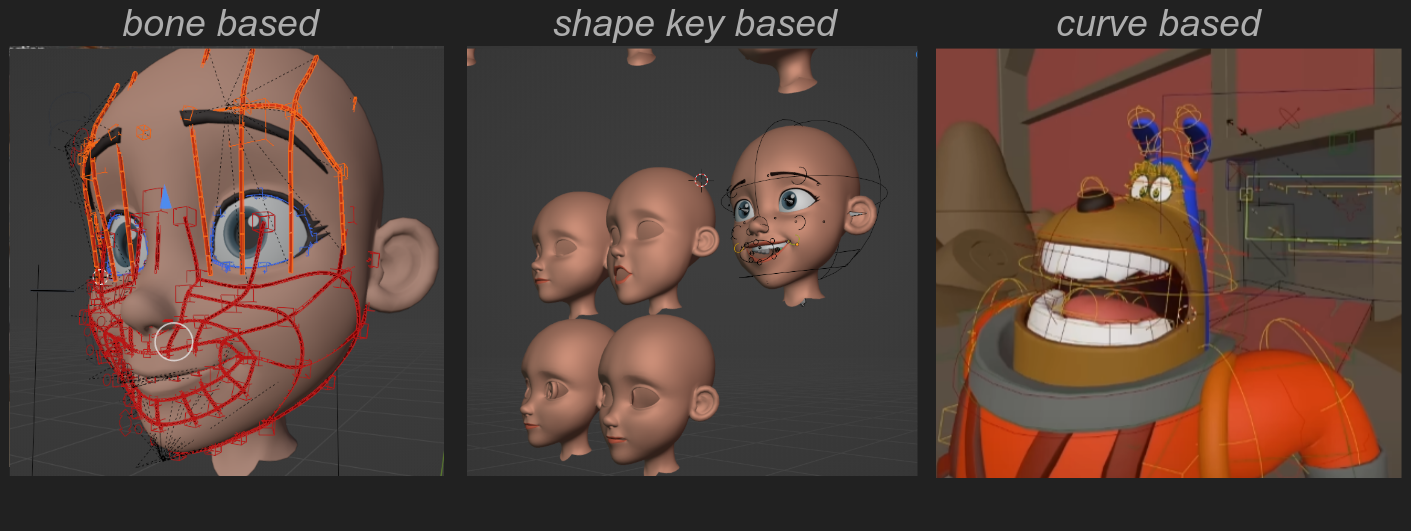
Common methods of facial rigging.
Now I do not claim to be a facial rigger at all. I am coming from the other side of the fence, as an animator using facial rigs. But given that the majority of appealing facial rigs that I've worked wit are in fact shape key based, I'm proposing to support this rigging workflow in Blender in order to support other studios that want to lean into this method of rigging for their productions. This is by no means the one and only way of rigging a 3d character's face, given the spectrum of styles and approaches to facial rigging, but improving this particular workflow in Blender could potentially help a lot of animation studios or riggers in general. Ultimately, I would like to make an 'facial rigging' course on studio.blender.org that gives studios or individuals a solid foundation to build from. This would mean for the current shape key system, quality of life improvements, more dynamic operators and new tools to streamline the 'shape key based' facial rigging workflow.
This is a proposal for Blender Studio, as well as the community to respond to in order to gage the need for such an investment. Therefore we would love to get your input on this topic and hear from you if this would be something that would help your rigging workflow as well. Let your voice be heard by placing a comment at the bottom of this article, we'd love to hear from you!
What is Shape key Based rigging?
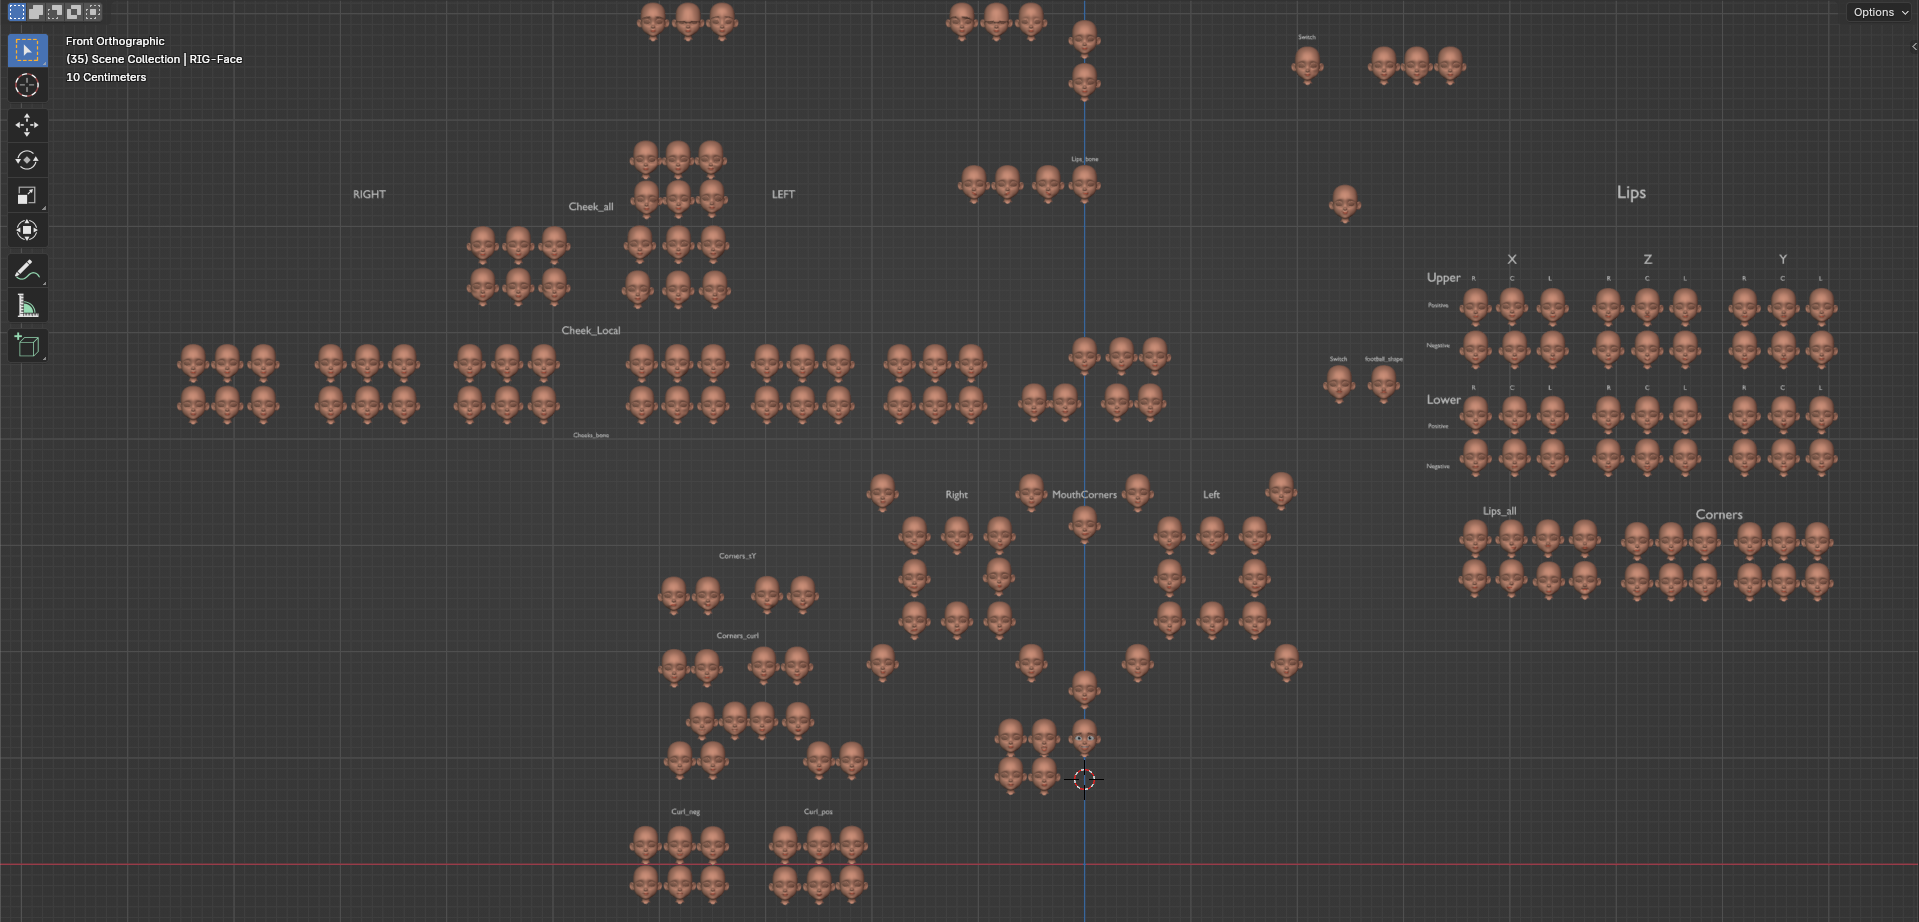
Shape Key based facial rigging consist primarily out of multiple connected shape keys and corrective shape keys that neatly blend together resulting in dynamic and designed facial deformations. These shapekeys are manipulated by control bones connected to individual vertices and are linked through drivers (with expressions), triggering one or multiple shape keys at once in order to reach the designated deformation. The animator moving the bone in 3d space is actually an illusion, it is bound to the mesh which is simply triggering shapekeys and seem like it is moving in space. This allows the rigger to combine infinite amount of shapes while the bones are following correctly.
The majority of shapekeys can be automatically generated by splitting weights. The initial deformation has been done by the artist.
The method of creating shape keys is duplicating the face mesh and creating designed deformations on this. In order to create a smooth transition between the different shapes (for example the mouth corners, a temporary armature is created in order to generate the range of motion on the initial mesh) Parts of the face like the lips, cheeks and brows are using a single deformation bone to create the range of motion (positive and negative in X, Y and Z) for the shape keys. this bone will be neatly weightpainted to the correct deformation area to create an organic and appealing deformation. Once this is established, I extract all key poses from the animated bone. This should get us 85% to the final shapes and can be tweaked, sculpted, masked additionally. Once these are looking good, the shape keys will be split into separate (local) shapes and assigned to its designated control bones. This process can be partially automated and will save a lot of time.
workflow of generating shapes by using an animated bone.
Adjusting shapes can be done rather easily when following this workflow, by adding a new shape key as a layer and tweaking on that layer as desired. This way it is non-destructive and makes it easy to manage iterations. For updating existing shapes on the facial rig, i've created a script that automatically updates shape keys within its designated collection. This is a clean way to update vertex data within each shape key without losing its drivers.
A similar method is used to deform and design the cheeks and brows
Additionally, Bones will be the foundation for the main structure and movement of the skull, jaw, eyes, eyelids/lashes, nose and ears. (and eyelids) as they are more static and in no need of heavily designed or complex deformation. Deformations are pre-designed by the rigger and approved by the supervisor so that the animator has a good foundation of setting up the expressions relatively easily without manipulating too many bones.
Bones are used for the basic structure of the eyes, jaw, nose and ears
Control Bone Attachment to Mesh Vertices To attach control bones to the face, we need to avoid dependency cycles. In order to achieve this, we use the Display Override transform. The hook bones are placed with a location constraint attached to a 'single-vert' vertex group. Now the bones are following the designated vertex location. The function of these hook bones are basically to drive the display location of the Control Bones which drive the connected shapekeys.
Hook bones are placed and are connected to the mesh. Control bones are then using these to follow the mesh deformation seemlessly.
Proposal for developing a Facial Rigging course
Now you might think, this seems like old techniques from the 2000's, but it's still being used as standard at AAA animation studios simply because of the artist oriented workflow and the ability to art direct it effectively in early rigging stages. It is just that the knowledge of doing such a workflow in Blender doesn't provide such a workflow very well at the moment. At least not to the extension of managing and iterating the facial rig properly in a production environment in a non-destructive way. I'd like to improve on better tooling, quality of life improvements of the shapekey implementation and optimization of storing shape keys.
Wow! You made it to the end of the article :D. I'm excited to implement a solid workflow like this for high quality characters in Blender. Would you like to see a course on how to make a shape key based facial rig with this workflow? Let us know in the comments below!
Join to leave a comment.