Login to view this content
Join Blender Studio for just ¥90/month and get instant access to all of our training and film assets!
02. Texture Adjustments
Straighten Texture

Krystal
Author
Steps:
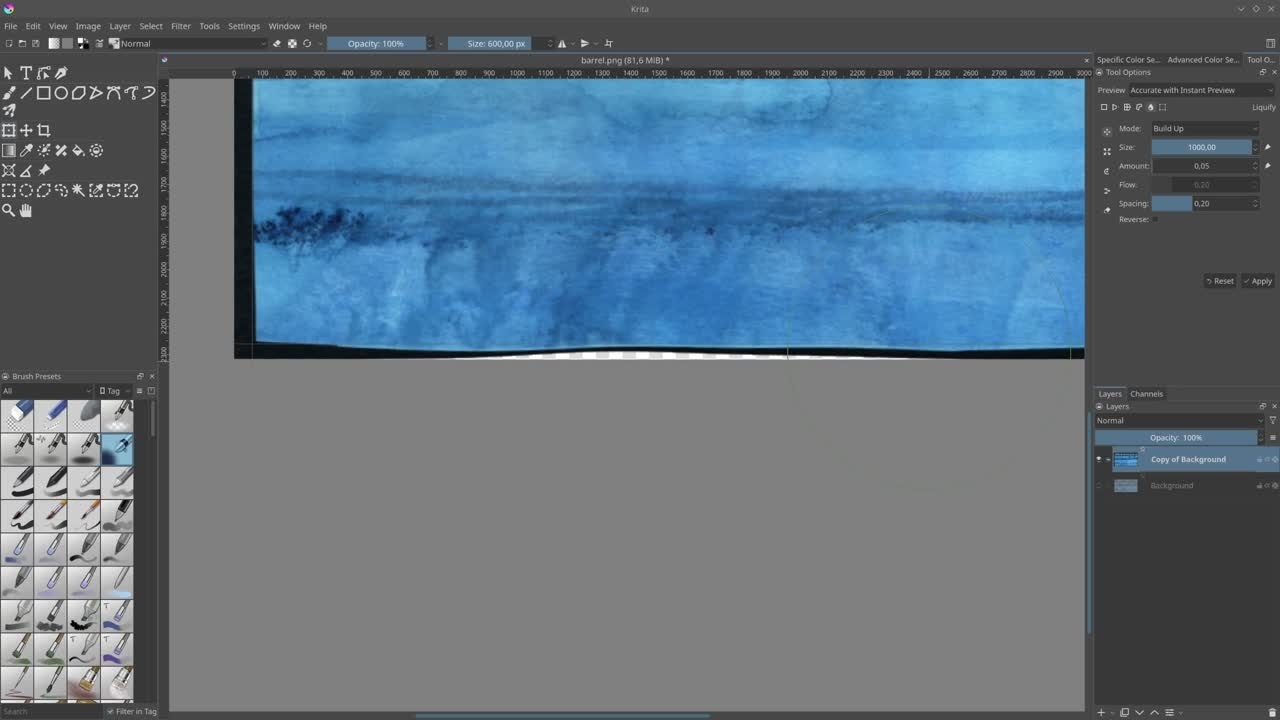
- Drag the "barrel_scan.png" into Krita.
- Use two horizontal and two vertical guides by dragging with the cursor from the rulers onto the canvas. If you can't see the rulers, go to View > Show Rulers.
- Duplicate the current layer by using Ctrl + J en hide the bottom layer.
- Lock the guides by going to View > Lock Guides, to avoid accidentally moving them while adjusting the texture.
- Hit Ctrl + T to go into Transform Mode and open the Tool Options (Usually at the top right) and choose the Liguify (droplet icon).
- Start matching the edges of the scan with the guides, increase/decrease the size of the brush if necessary.
- Scale the layer down a bit so we have more room to work with.
Join to leave a comment.