Viewport Navigation

- Free
In this section, we will navigate around the 3D Viewport using the Navigation Gizmo, including using the mouse and keyboard. There will be more shortcuts, so make sure to take notes and practice.
Navigation Gizmo
Open a new Blender file and let's navigate around the scene again using the Navigation Gizmo holding the LMB.
By hovering over the spherical elements on the gizmo, it will highlight which axis you can select. If you select that axis, it will snap/align the view to this axis. It will also make the projection Orthographic, which "flattens" everything like a technical drawing (this might be helpful to judge proportions). If you try and navigate around the cube, you will notice it switches to perspective again. In the top left corner, you can always see which view you are in.
The buttons below the Navigation Gizmo are additional ways to navigate the 3D scene. Try to do the same.
The magnification icon allows you to zoom in and out. Hold LMB and drag up or down to zoom in and out towards the center of the screen (by default).
The Hand icon allows to "pan" the view, which moves it on a flat plane.
What is the camera icon?
The Camera icon switches between this current view and the camera in the scene.
The Grid icon or Projection switches between Perspective (which you currently have) or Orthographic, which is a flat projection, making the view "flat".
Important
You might ask yourself if there is a faster way to work, and there is! We can also use the mouse and the modifier keys (Alt, Ctrl, Shift) including the Numpad to navigate the scene.
Faster Navigation
To navigate Blender, we'll assume that you have a standard mouse with 3 mouse buttons: Left, Right and Middle (pressing the mouse wheel). The same goes for Pen Tablets with the two side buttons and pressing the pen on the tablet surface.
Use and hold the MMB to orbit around the view.
Hold Ctrl + MMB and drag the mouse up and down to zoom in and out. If you have a mouse, you can also use the scroll wheel. For tablet users, you can alternatively use the wheel on your tablet.
Hold Shift + MMB to pan the view.
If you have a numpad on your keyboard, on the right side with the Num-key, you can use:
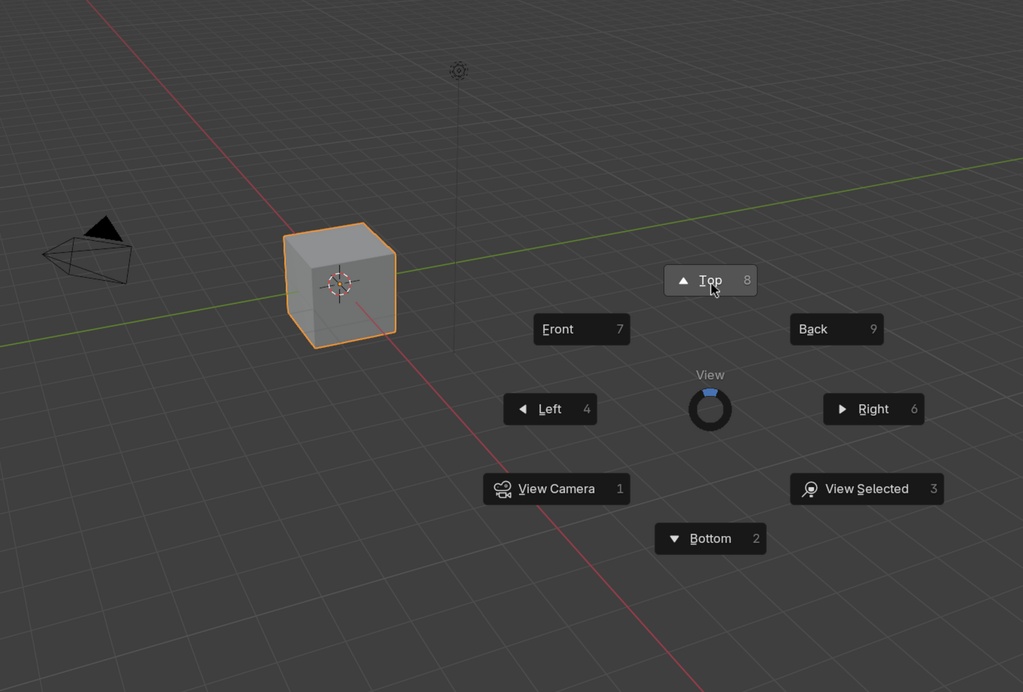
Numpad 1to go to the Front viewNumpad 3to go to the Right (side) viewNumpad 7to go to the Top view
You will notice that the view projection is switched to Orthographic when using the numpad keys. Using the previous numpad keys by first holding Ctrl + numpad-key will reverse the view. So Ctrl + numpad 1 will be the Back instead of the Front, try the other key combinations yourself.
The Numpad + 2 or 4 or 6 or 8 will allow you to rotate the view in 15-degree increments. This isn't something you will often use, but it is good to know that it is possible.
Numpad 5 is used to switch between Perspective and Orthographic.
An alternative method to zoom is using the Numpad + +/- plus or minus to zoom in and out.
Most of these can be accessed using the ~ key, that will open a pie-menu.
Tip
If you want to align your view even faster without using the numpad, you can orbit using MMB normally, but introduce holding Alt to snap in 45-degree increments.
Additional Navigation
- Use
Numpad .to Frame Selected. - Use
Shift + Bto Zoom Region drag a box and the view will zoom towards that region.
That was a lot of information to process, but it is worth getting familiar with the fundamental ways of working in Blender. Take some time to try it again yourself.
That was the end of the lesson. We have learned:
- How to navigate using the Navigation Gizmo.
- How to navigate using the mouse and keyboard.
- How we can use the Numpad to navigate the scene.
Join to leave a comment.